Background Information
Back when I was into the GPU cryptocurrency mining scene (I fell deeply into it during the end of 2017) it became important to measure energy consumption. To do this, I rigged a couple of Hall-effect current sensors to an Arduino and fed the data through a BeagleBone Black that kicked the data up to an influxdb instance on an ESXi on a Mac Mini… Needless to say this was convoluted and I’d since ditched all these complexities (along with GPU mining itself) and later began using Unraid which I’ve blogged about a few articles back. I highly recommend it for its ability to bring the absolute Zoo of home serving under control with a solid persistence layer.
Project Story
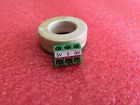
I purchased these sensors on eBay for ~$9 each. I’m told they are not the best for AC current measurement but they work pretty well and are fairly accurate if you’re willing to tolerate up to an amp of error (I know that’s a lot but it’s the first draft of the hardware in this case).

Equipped with two of these sensors, I rigged the two phases of my sub-panel by slipping each phase wire into its own sensor, and then wired the sensor’s pins to the Arduino Uno. I believe it was a simple analog value that I had to make it read. I had to write some code to convert the analog reading to amperes and then write those values out together on one line for every “tick” which turned out to be just over one second. It looks like this to anyone reading the serial port:
1 | 0 0 |
I describe it like that because it was a bit of an archeological experience reviving this piece of hardware from almost three years ago. I don’t know about you, but I have so many projects behind me now that I am often finding myself reverse engineering my own creations. If the interfaces are not simple this is very painful. Luckily in this case it is a very simple and logical interface.
In the above example there was no usage (0 amps on each phase), then a little usage (1 amp on the first phase, 2 amps on the second phase), then a bit more… you get the idea.
I have lost this code and recall feeling bad about its quality (due to the wrong sensor selection for the use case, leading to poor precision and bad smells leaking into the code I had to write, presumably why I have “lost” it and never wrote about it at the time), so I look forward to rewriting this part of the system later without being in a rush and placing more attention on part selection for more accuracy and precision.
Downstream of the Arduino I had originally implemented a design that I was not proud of: Instead of computing the cost accrual for each interval, I was pushing the raw data into the time-series database and then retrospectively querying and computing costs! Although this sharpened my teeth on using influxdb from a consumption point of view, this was a bad design resulting in an uncomfortable workflow requiring me to modify dates in source code that I’d execute in order to generate a report. Wouldn’t it be nice to utilize Grafana’s date range query powers? At the time I believe I was using Chronograf (InfluxData’s grafana competitor) but the crypto project really got me well-versed in Grafana, so I knew this time around how I wanted things to work.
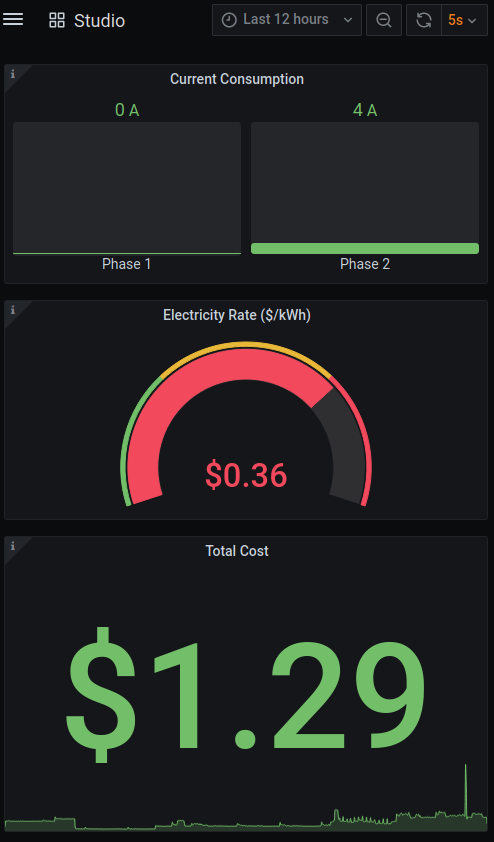
This time around we are executing the appropriate math upfront so that the relevant information (the “cost per tick”) is sent to the time-series database. By doing this math upfront we leverage grafana’s ability to total a series of accruals and can generate the financial report for any time interval right from the browser! In the following screenshot you can see this demonstrated in the panel entitled “Total Cost” below. Notice this is for the “last 12 hours” time range in grafana. In this way, at the end of the month, I can ask grafana how much currency accrued during that month. Bear in mind this is all in spite of the fact that we have a variable time-of-use rate policy here where I live. This complexity is taken care of in the software that processes the data from the arduino prior to shipping it off to the time-series database.

The deployment can be described tersely as follows:
- Arduino writes over Serial port through internal USB-Serial device to my Unraid tower.
- Unraid tower runs a docker container that uses this device (–device=/dev/ttyUSB0) to read values.
- The docker container contains extra information about our provider’s rate schedule and computes cost per tick.
- Finally, the values are pushed to InfluxDB for viewing by Grafana. These are also docker (Community Apps) on Unraid.
Project Improvements
- Hall-effect ammeters are good for measuring DC current, not AC current. For this project they work okay but are very low resolution. There is a major loss due to the diminished faith in the data resulting from the low resolution. Replacing these sensors is a good future task.
- Serial access is great but wireless access is more interesting. Consider applying BLE knowledge here, although powering the device becomes a problem too.
- Explore data for the purpose of expansion. For example let’s say we want to load-shift more expensive time to cheaper time by installing batteries that we drain during the day and reload during the night. We would need to do some capacity planning. Now we are equipped with sufficient behavioral information in order to perform such analysis and planning which would directly inform the design and component selection decisions.
Article Improvements
- The arduino code is simple, but it is missing. When replacing the sensors be sure to include that code as well.
Resources
- Source code repository can be accessed through GitHub here